

Unityでノベルゲームを作ろう!(第7回:選択肢編)
お疲れ様です、poppyです。本日もこちらのブログを見に来てくださりありがとうございます。
今回もUnityでアセットを使わずにノベルゲームを作るところをお見せいたします。
第7回は「選択肢編」ということで、前回までの条件比較を用いて選択肢を実装します。
制作環境
制作環境は第1~6回と同様です。また、変数についても第1~6回のものを使い回すのでご注意ください。
- バージョン:2022.3.24f1 (日本語化パッチ適用済み)
- テンプレート:Universal 2D
- スクリプト:Visual Studio 2022 (Windows)
今回は「宴」などのアセットは用いませんのでご了承ください。(多分使ったほうが早くできるとは思うけど)
免責事項
当ブログの記載内容や情報の信頼性については可能な限り十分注意をしておりますが、その完全性、正確性、妥当性及び公正性について保証するものではありません。
情報の誤りや不適切な表現があった場合には予告なしに記事の編集・削除を行うこともございます。あくまでもご自身の判断にてご覧頂くようにお願い致します。
当ブログの記載内容によって被った損害・損失については一切の責任を負いかねます。ご了承ください。
お詫び
あくまでも実装当時のコードを掲載しております。現在はバグなどを潰すために修正を行っているため本記事とは異なるコードになっておりますが、
こちらに反映する予定はございません。大変申し訳ありません。あくまでも参考程度に見ていただければ幸いです。
今回の目標
第7回では以下のことができるようにします。
・選択肢を実装する
ボタンとオブジェクト・スクリプトの用意
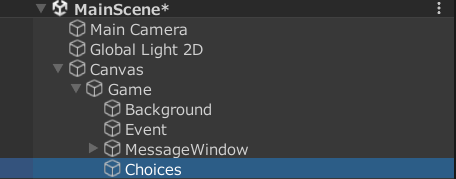
とりあえず、選択肢のボタン画像をあらかじめ用意しておく必要があります。私は適当にパワポで図形をいじって作りました。そして空のオブジェクト「Choices」を作成し、ヒエラルキーのMessageWindowよりも下に配置します(ただし下図にあるようにMessageWindowの子ではなくGameの子オブジェクトであることに注意)
また、選択肢を操作するために「ChoicesButtonController」の「スクリプト実効化」を行います(スクリプト実効化については第2回参照)。
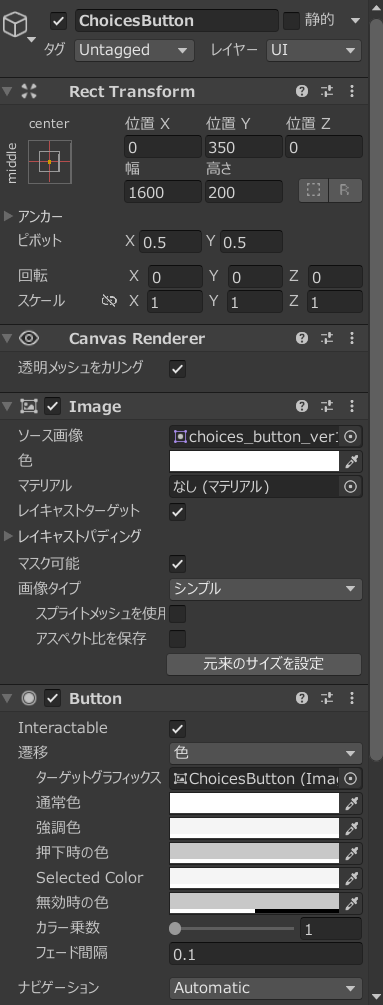
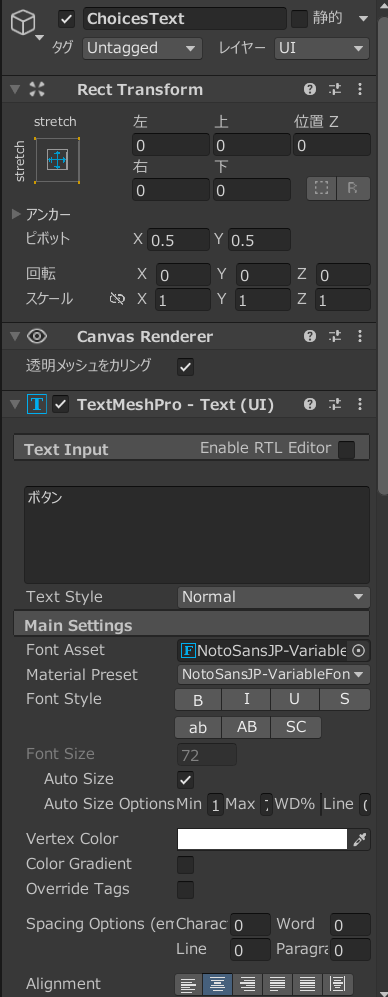
さらに選択肢ボタンのPrefabも作ります。先程のChoices直下に「UI→ボタン(TextMeshPro)」からボタンを生成します。するとボタンとその子オブジェクトにText(TMP)がついてきます。ボタンには「ChoicesButton」、テキストには「ChoicesText」とし、それぞれ以下のように設定します。ただし幅や高さなどは画像によって異なると思いますので参考程度にしてください。選択肢のボタン画像は「ChoicesButton」インスペクタのImageコンポーネントの「ソース画像」に入れてください。また、テキストのフォントは第1回でやったようにNotoSansJP-VariableFont_wght SDF.assetをいれないと日本語対応できないので注意してください。
ChoicesButtonControllerの編集
それではChoicesButtonControllerの編集を行います。自分ひとりでやるのは大変辛かったのでここはChatGPTにある程度任せつつやりました。
実装したい内容は概ね以下の通りです。それぞれの実装内容はコメントに記載されているはずです。
・選択肢ボタンとテキストの生成
・選択されたときの処理
・上下矢印キーを押したときに選択状態が移動し、エンターキーを押したときに選択された状態し、選択された状態がわかるようにする(薄くなる)
・クリックorエンターキーを押したときに選択された選択肢が黄色くなる
・クリックしたがやっぱりやめたいとなったときにドラッグしたままボタンからカーソルが離れた場合選択肢の内容が実行されずに非選択状態に戻る
・どれかの選択肢が選ばれた後に選択肢を消去する
using System.Collections;
using System.Collections.Generic;
using UnityEngine;
using TMPro; // TextMeshProを使用するための名前空間
using UnityEngine.UI;
using UnityEngine.EventSystems; // イベントトリガーを使用するための名前空間

namespace NovelGame
{
  public class ChoicesButtonController : MonoBehaviour
  {
    [SerializeField] GameObject _ChoicesObject; // ボタンを配置する親オブジェクト
    [SerializeField] GameObject _ChoicesButtonPrefab; // ボタンのプレハブ
    private List<Button> _buttons = new List<Button>(); // 生成されたボタンのリスト
    private int _currentSelectedIndex = 0; // 現在選択されているボタンのインデックス

    // 新しい選択肢ボタンを生成し、設定するメソッド
    public void PutChoicesButton(int buttonNum, string choiceText, int img_x = 0, int img_y = 0)
    {
      // ボタンのインスタンスを生成し、親オブジェクトの子として配置
      GameObject newButton = Instantiate(_ChoicesButtonPrefab, _ChoicesObject.transform);

      // ボタンの位置を設定
      RectTransform rectTransform = newButton.GetComponent<RectTransform>();
      rectTransform.anchoredPosition = new Vector2(img_x, img_y);

      // ボタンのテキストを設定 (TextMeshProを使用)
      TextMeshProUGUI buttonText = newButton.GetComponentInChildren<TextMeshProUGUI>();
      if (buttonText != null)
      {
        buttonText.text = choiceText;
      }
      else
      {
        Debug.LogWarning("Button prefab does not have a TextMeshProUGUI component.");
      }

      // ボタンのOnClickイベントを設定
      Button button = newButton.GetComponent<Button>();
      if (button != null)
      {
        int index = _buttons.Count;  // 現在のボタン数をインデックスとして保存
        button.onClick.AddListener(() => OnChoiceButtonClicked(index));
        _buttons.Add(button);

        // イベントトリガーを追加
        EventTrigger trigger = button.gameObject.AddComponent<EventTrigger>();

        // OnPointerDown イベントを設定
        EventTrigger.Entry pointerDownEntry = new EventTrigger.Entry
        {
          eventID = EventTriggerType.PointerDown
        };
        pointerDownEntry.callback.AddListener((data) => { OnPointerDown(button); });
        trigger.triggers.Add(pointerDownEntry);

        // OnPointerUp イベントを設定
        EventTrigger.Entry pointerUpEntry = new EventTrigger.Entry
        {
          eventID = EventTriggerType.PointerUp
        };
        pointerUpEntry.callback.AddListener((data) => { OnPointerUp(button, index); });
        trigger.triggers.Add(pointerUpEntry);

        // OnPointerExit イベントを設定
        EventTrigger.Entry pointerExitEntry = new EventTrigger.Entry
        {
          eventID = EventTriggerType.PointerExit
        };
        pointerExitEntry.callback.AddListener((data) => { OnPointerExit(button); });
        trigger.triggers.Add(pointerExitEntry);
      }
      else
      {
        Debug.LogWarning("Button prefab does not have a Button component.");
      }

      // 新しいボタンを追加した後に選択状態を更新
      UpdateButtonSelection();
    }

    // ユーザーの入力を処理するメソッド
    public void HandleInput()
    {
      if (Input.GetKeyDown(KeyCode.UpArrow))
      {
        _currentSelectedIndex = (_currentSelectedIndex - 1 + _buttons.Count) % _buttons.Count;
        UpdateButtonSelection();
      }
      else if (Input.GetKeyDown(KeyCode.DownArrow))
      {
        _currentSelectedIndex = (_currentSelectedIndex + 1) % _buttons.Count;
        UpdateButtonSelection();
      }
      else if (Input.GetKeyDown(KeyCode.Return))  // Enterキーが押されたとき
      {
        _buttons[_currentSelectedIndex].onClick.Invoke();
      }
    }

    // ボタンの選択状態を更新するメソッド
    private void UpdateButtonSelection()
    {
      for (int i = 0; i < _buttons.Count; i++)
      {
        Image buttonImage = _buttons[i].GetComponent<Image>();
        if (i == _currentSelectedIndex)
        {
          // 選択中のボタンに白いフィルターをかぶせる
          buttonImage.color = new Color(1f, 1f, 1f, 0.8f); // 透明度を少し上げてフィルター
        }
        else
        {
          // 他のボタンの背景色を元に戻す
          buttonImage.color = new Color(1f, 1f, 1f, 1f);
        }
      }
    }

    // ボタンからカーソルが離れたときの処理 (フィルターを解除)
    private void OnPointerExit(Button button)
    {
      Image buttonImage = button.GetComponent<Image>();
      buttonImage.color = new Color(1f, 1f, 1f, 1f); // 元の色に戻す
    }

    // ボタンが押されたときの処理 (黄色く光らせる)
    private void OnPointerDown(Button button)
    {
      Image buttonImage = button.GetComponent<Image>();
      buttonImage.color = new Color(1f, 1f, 0.2f, 0.8f); // 薄黄色のフィルター
    }

    // ボタンが離されたときの処理
    private void OnPointerUp(Button button, int index)
    {
      Image buttonImage = button.GetComponent<Image>();
      buttonImage.color = new Color(1f, 1f, 1f, 1f);  // 元の色に戻す

      // マウスがボタンの上にある場合のみ選択確定
      if (RectTransformUtility.RectangleContainsScreenPoint(button.GetComponent<RectTransform>(), Input.mousePosition))
      {
        OnChoiceButtonClicked(index);  // 選択確定
      }
    }

    // ボタンがクリックされたときの処理
    private void OnChoiceButtonClicked(int buttonNum)
    {
      buttonNum++; //1からにするため
      Debug.Log("Button " + buttonNum + " clicked");
      ClearChoices();
      GameManager.Instance.variablesManager.SetVariable("choiceValue", "=", buttonNum.ToString(), "int");
      GameManager.Instance.userScriptManager.GoToTheNextLine();
    }

    // 全ての選択肢を消去するメソッド
    private void ClearChoices()
    {
      foreach (Button button in _buttons)
      {
        Destroy(button.gameObject);
      }
      _buttons.Clear();
      _currentSelectedIndex = 0;
    }
  }
}
_ChoicesObjectにはオブジェクト「Choices」を、 _ChoicesButtonPrefabには先程作成したPrefab「ChoicesButton」をいれてください。もちろんこれだけでは駄目なのでGameUpdateManagerとUserScriptManagerもいじります。
GameUpdateManager.cs(更新するメソッドのみ)
// Update is called once per frame
void Update()
{

  if (stateMode == "novel")
  {
    //novelモードのとき、mainTextControllerのnovelUpdateを呼び出す
    GameManager.Instance.mainTextController.novelUpdate();
  }
  else if(stateMode == "choice")
  {
    GameManager.Instance.choicesButtonController.HandleInput();
  }
  else
  { //waitモードなど他のモードのときは何もしない
    return;
  }
}

//中略

 //選択肢モードにするメソッド
 public void TurnOnChoicesMode() {

   stateMode = "choice";
 }
UserScriptManager.cs(更新するメソッドのみ)
    // ステートメントを実行するメソッド
    public void ExecuteStatement(string sentence)
    {
      string[] words = sentence.Split(','); // 文章を単語に分割する
      float _fadetime = 1f;

      // 単語によって処理を分岐する
      switch (words[2].ToLower())
      {
      //今まで作った他のcaseは中略

        case "choice":
          GameManager.Instance.gameUpdateManager.TurnOnChoicesMode();
          int buttonNum = ConvertToInt(words[3]);
          string choiceText = words[6];
          GameManager.Instance.choicesButtonController.PutChoicesButton(buttonNum, choiceText, ConvertToInt(words[4]), ConvertToInt(words[5]));
          GoToTheNextLine();
          break;
        case "choiceend":
          GameManager.Instance.gameUpdateManager.TurnOnChoicesMode();
          break;
        default:
          break;
      }
    }
テキストスクリプトにはこのように書くことを想定しています。
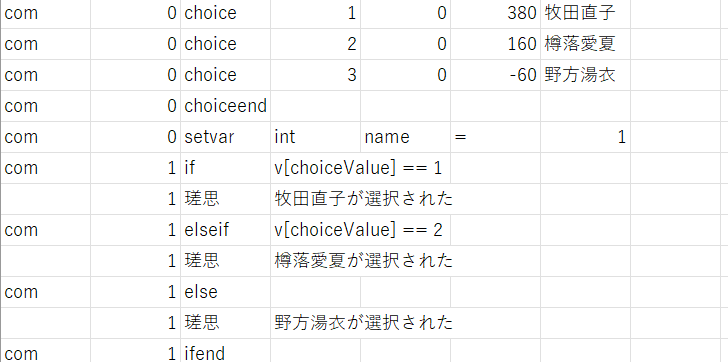
choiceの後には番号、X座標、Y座標、テキストの順に並べておりchoiceendは選択肢終了を意味するコマンドになっています。そして選択肢が押された後、選んだ選択肢とchoiceValueの値が対応しており(1番が牧田直子、2番が樽落愛夏・・・)、前回の比較演算と条件分岐を用いて選択肢ごとの内容を用意します。
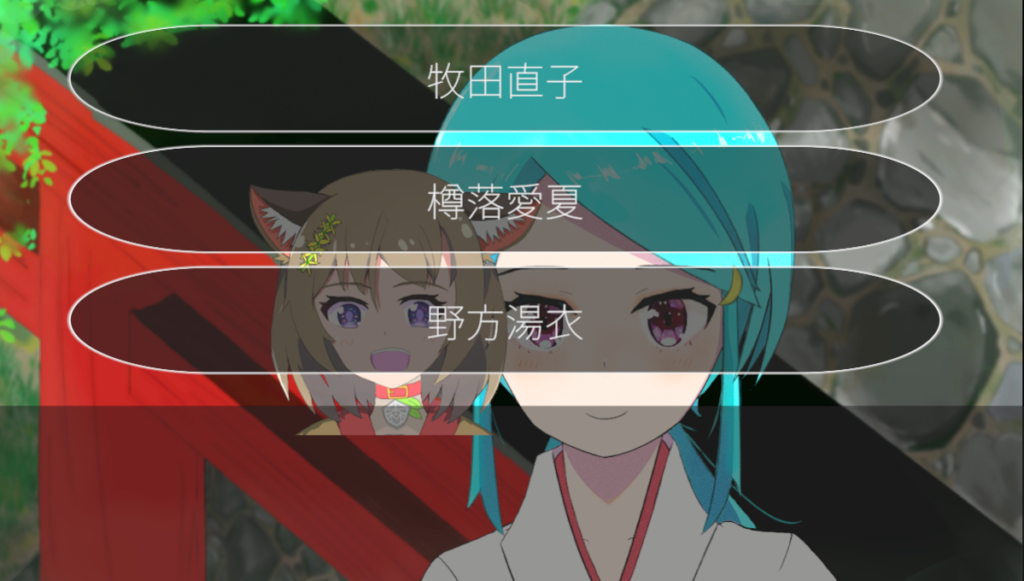
このように選択肢を実装することができました!
終わりに
ということで今回はノベルゲーム開発の第7回ということで選択肢の実装を行いました!
それではまた!